Tuesday, 17 June 2014

Don’t Kirai for me Argentina…


Well it seems that after getting my blog up to date with Catchup week I’ve now dug myself into yet another hole with another 4 Masters played and in need of an article! Rather than dedicate another week to posting about these Masters (thus cutting into my painting time) I might just try and get through them in the time I have and see how I go. Anyway, first off the block is Kirai!
                                            
The Master
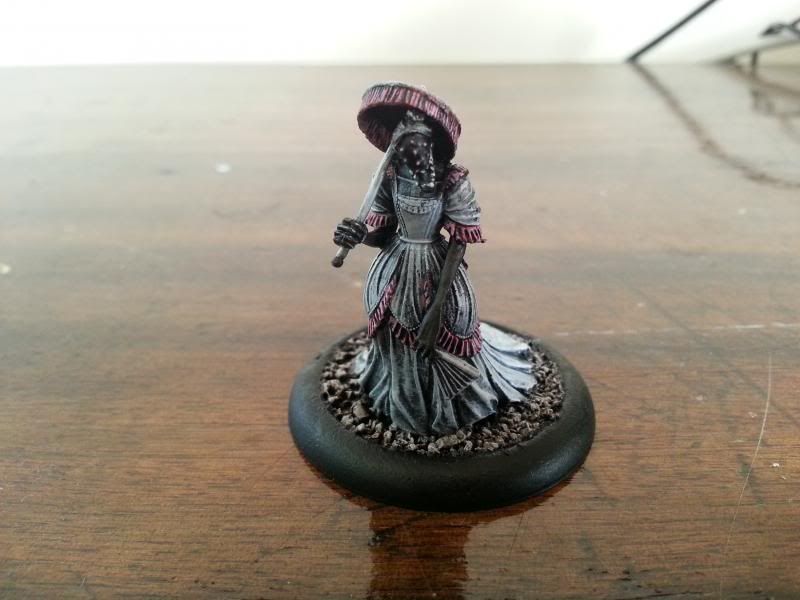
Kirai was a very nasty Master back in 1st edition Malifaux. As one of the releases in the aptly named “Rising Powers” expansion to Malifaux, she was considered well and truly above the power level of her fellow Resurrectionist Masters. Perhaps not as horribly broken as the original Hamelin or Dreamer crews but in my experience, still very tough to deal within. It’s mostly for that reason that I’ve steered clear of using Kirai. After all, Masters near the top of the power curve never really interested me as much as ones I could feel more challenged by.

To add to that, I’ve never liked Kirai’s background. As far as I can see, some shmuck kills her boyfriend and she then mopes around Malifaux for two books, crying about how unfair it all is and unwillingly being egged on by some malevolent spirit to seek vengeance against those who wronged her (which seems to be everybody). Now in the real world I’d completely understand and sympathise with Kirai and the serious emotional baggage she carries around. But this is the fantasy world of Malifaux, where monsters are very real and people regularly die in increasingly gruesome and disturbing ways. In that world, Kirai getting all mopey about some boyfriend getting shot just makes her look like a whiney crybaby. By comparison, I bring your attention to Zephyr – the desperate merc in the Twisting Fates story “A Great Adventure”.  Her son is brutally murdered by who knows what kind of horror and her husband hanged for the crime, but does she collapse in a heap cry like a baby? Hell no. She picks up a pistol then proceeds to hire her services out to any who’ll pay to acquire the funds necessary to bring her family back from the freaking dead. Unlike Kirai, she’s a god damn bad ass.

Fortunately the new art for Kirai gives me some hope that she’ll soon grow a backbone and aspire to be as awesome as Zephyr. Still, when it came to playing her for the Rainbow Challenge I was pretty ambivalent about her.
 See? She looks much more like a bad ass in the new art. ;)

The Paint Job
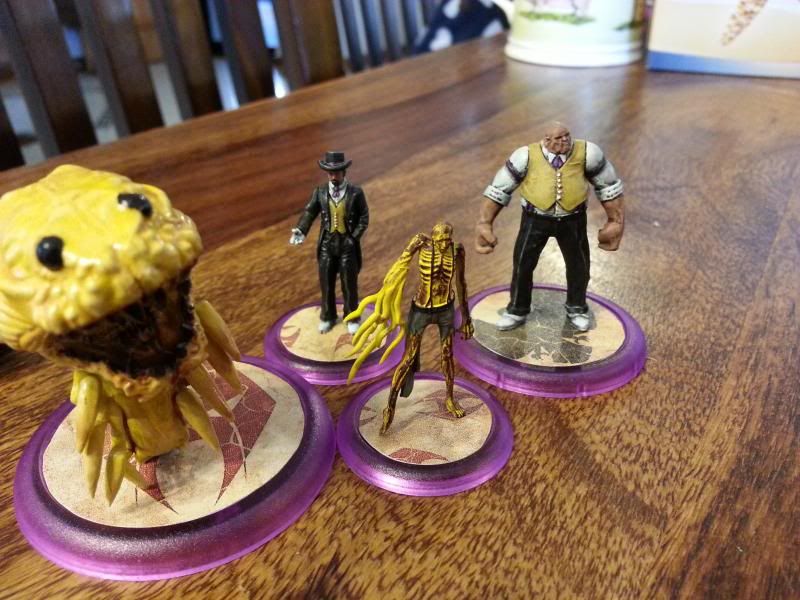
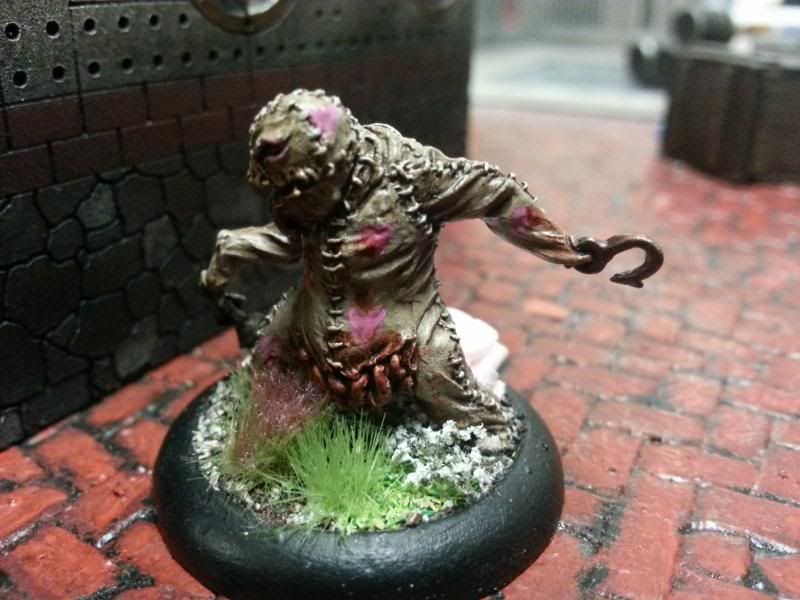
In a sense, Kirai’s is a very demoralising crew to paint. Kirai, Ikiryo and 5 Seishin total 7 models – as many minis as most other crews and that’s before you’ve spent a soulstone on her crew proper! But even after maybe half a dozen models to fill out her crew, you still need Gaki, Shikome and whatever other spirit minions you might need for her summons. In my case, it came to 16 models, although it could have easily exceeded 20 if I didn’t already have painted models for some of her summons (eg. Night Terrors, Shikome, Hanged, Drowned). I guess I should have expected this kind of model count for a summoning Master. However having mostly steered away from Ressers as a Faction, this was my first time actually painting a crew for one!

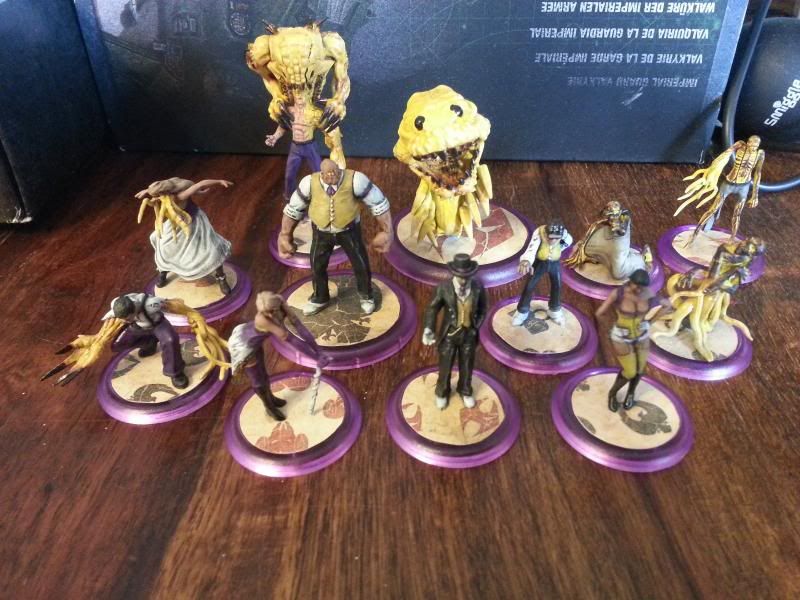
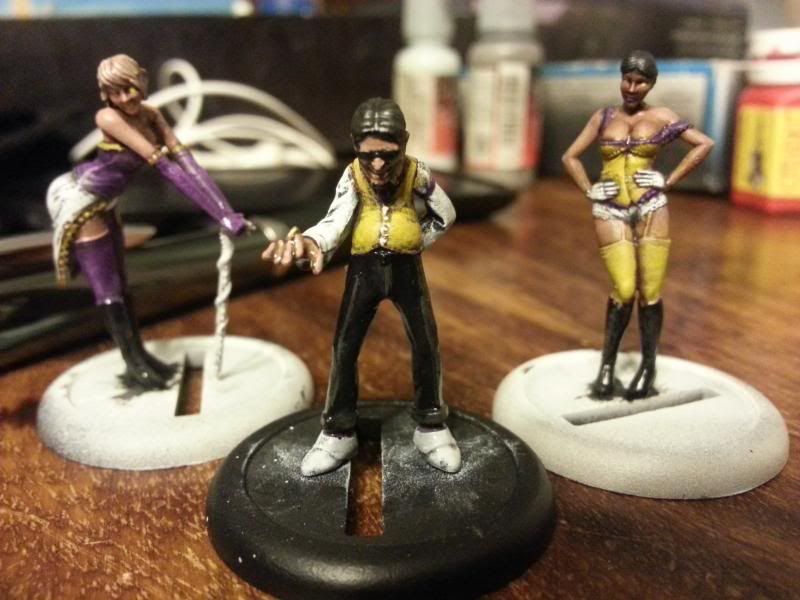
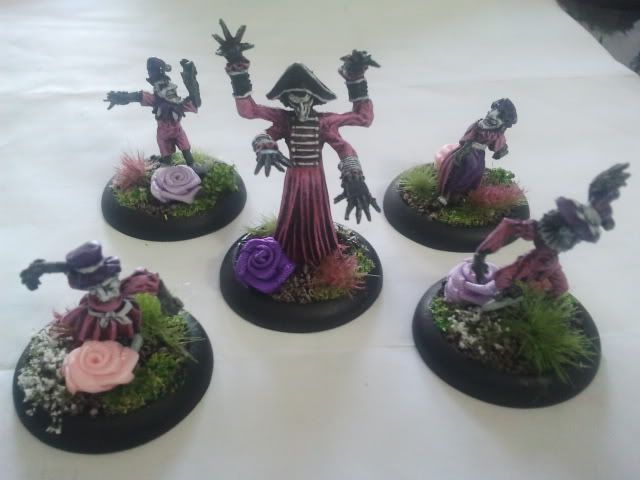
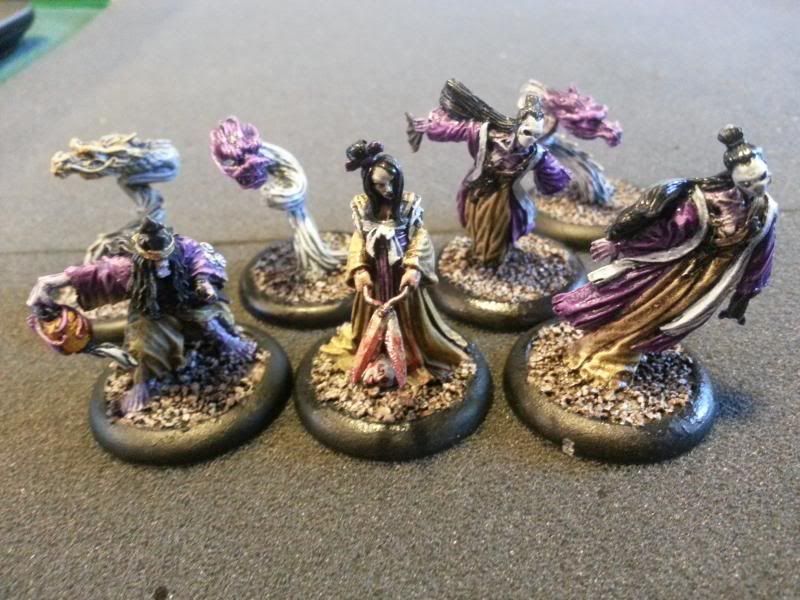
Anyway, despite my gripe about the model count, I’ll admit I did enjoy painting Kirai’s crew. The Yellow/Purple colour scheme originated from my Jakob Lynch crew, and I dare say it turned out even better with Kirai. As usual I didn’t manage to get the bases fully done before playing, but with the flowers it’s at least not bare! My only regret with this crew is that I didn’t manage to come up with a unique theme of some kind. It’s not necessarily a bad thing but after the likes of Adventure Time McCabe, Cake Time Mei Feng or Tea Time McMourning, it does feel like a bit of a let down.

6 models plus Master, 0SS. God damn it...

The Game
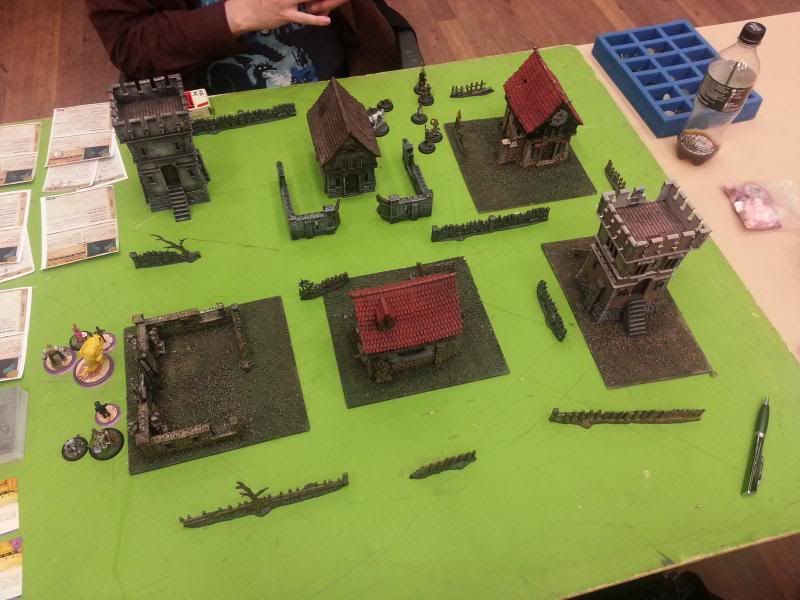
45SS, Corner Deployment
Strategy: Squatters Rights
Schemes:
- Line in the Sand
- Breakthrough
- Assassinate
- Vendetta
- Power Ritual

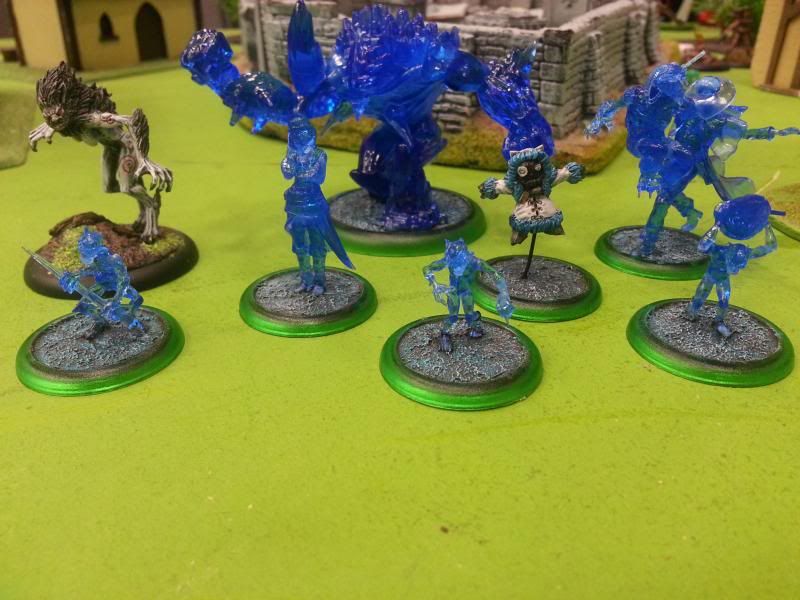
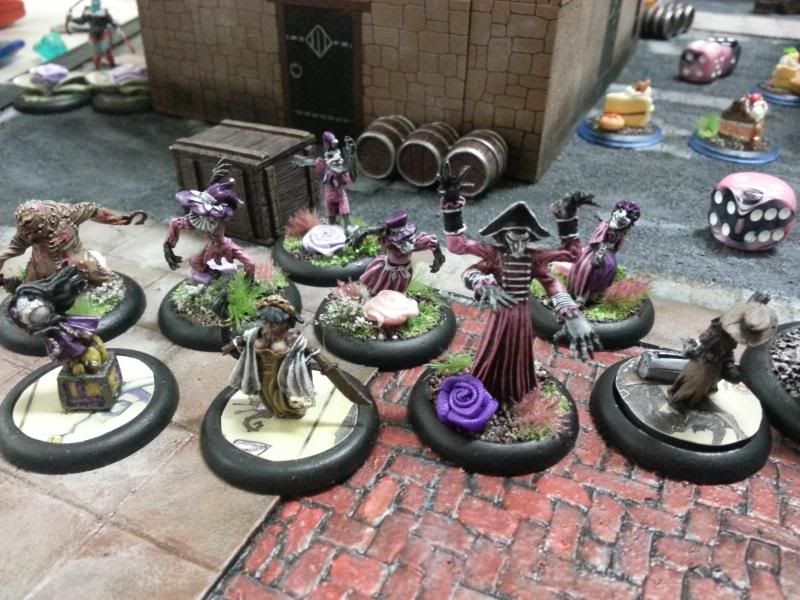
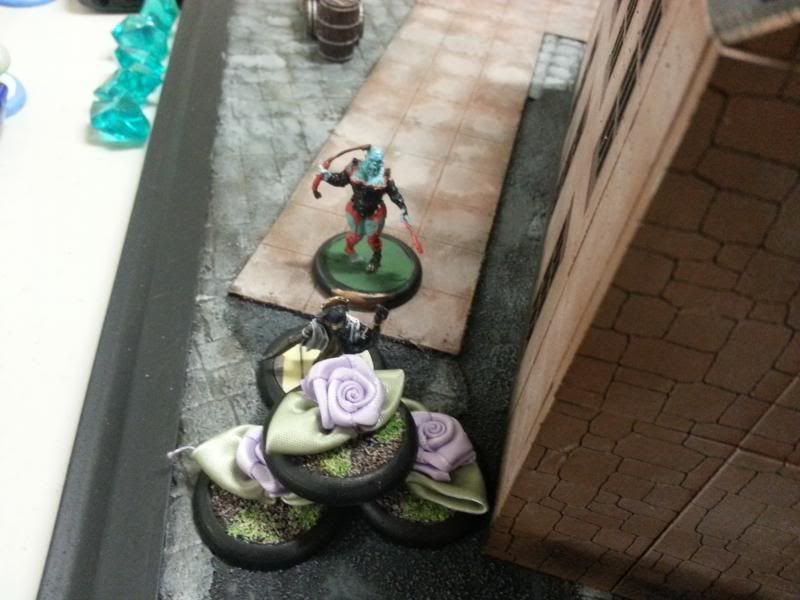
Kirai's crew for the day. I'm still trying to figure out a good base colour for Izamu. :P

The List
Kirai
- Absorb Spirit 1
- Swirling Aether 2
- Unforgiven 2
Datsue Ba
- Spirit Whispers 1
Izamu the Armor 1
- Spirit Becon
Lost Love
Onryo
2x Necropunks

This felt like an uncomfortably small crew when I was putting it together, although I guess I shouldn’t be surprised with both Datsue Ba and Izamu effectively filling up half my crew allowance. The theory with the crew was to start with a solid core of Kirai, Datsue Ba and Izamu, then use all three to summon an arse-load of Seishin and by extension, some bigger spirits to bolster the crew’s hitting (and Interacting) power. The Necropunks were there, of course, for some mobility and scheme-planting adventures.

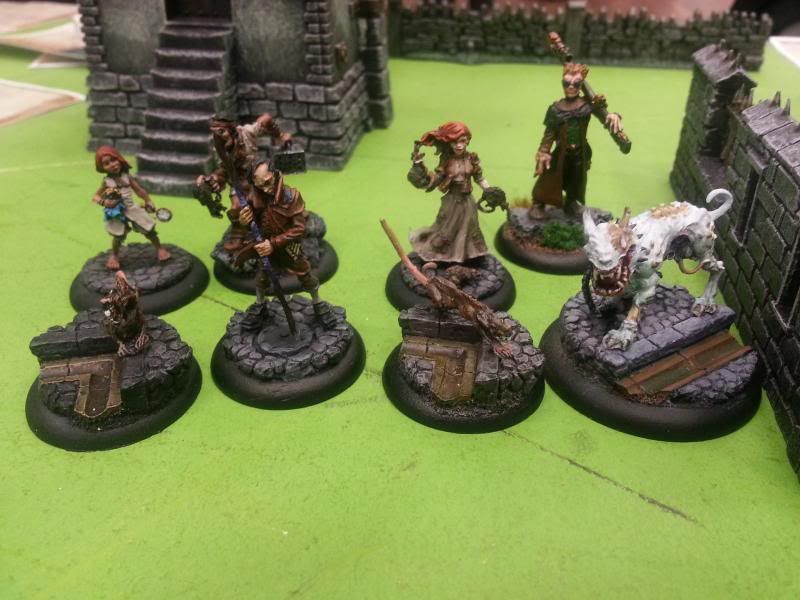
For schemes I chose Line in the Sand and Power Ritual. I can’t say I was surprised when Chris chose the same schemes, especially with a pair of Trappers selected to hold each corner!

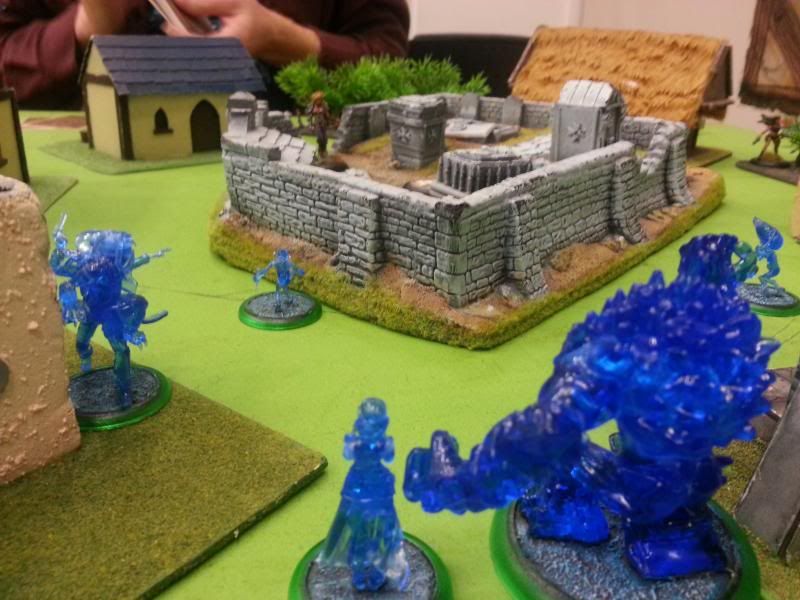
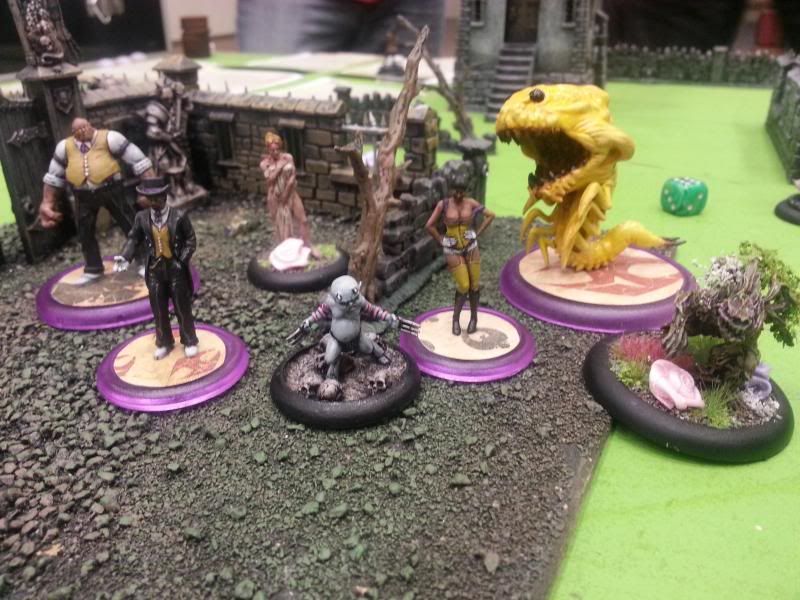
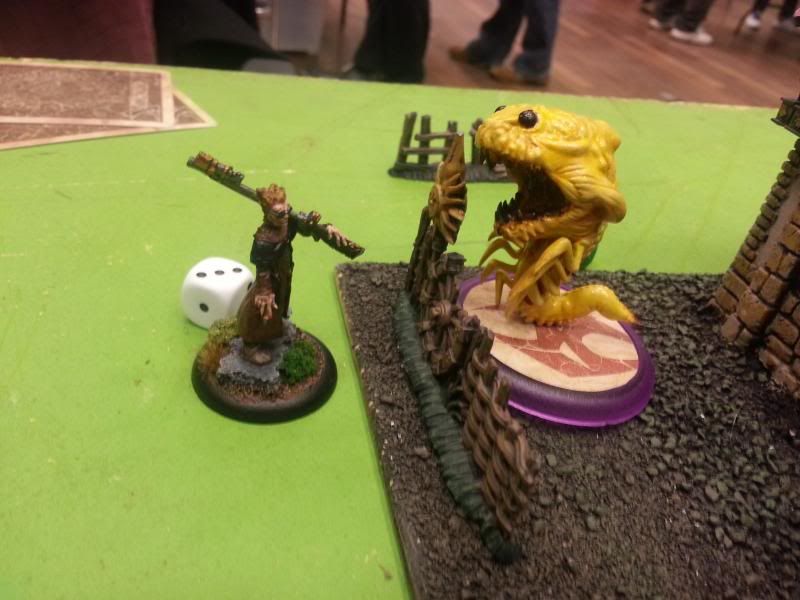
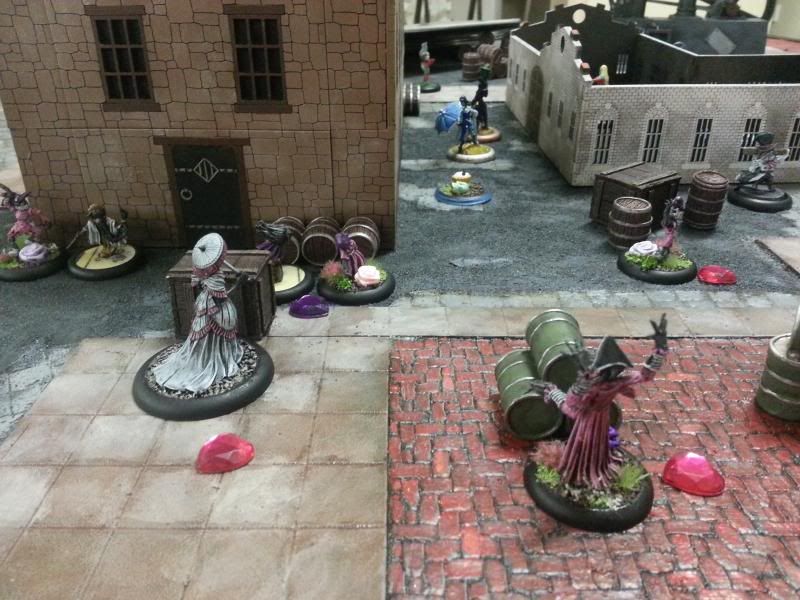
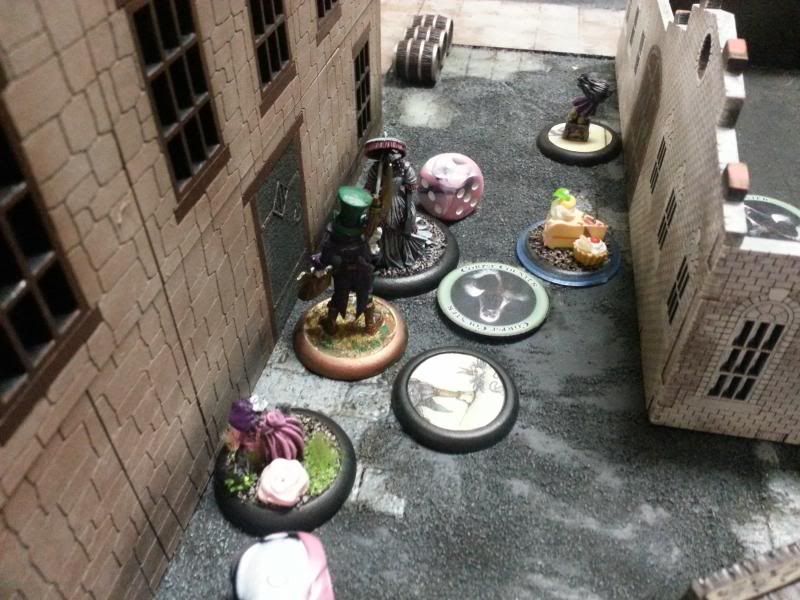
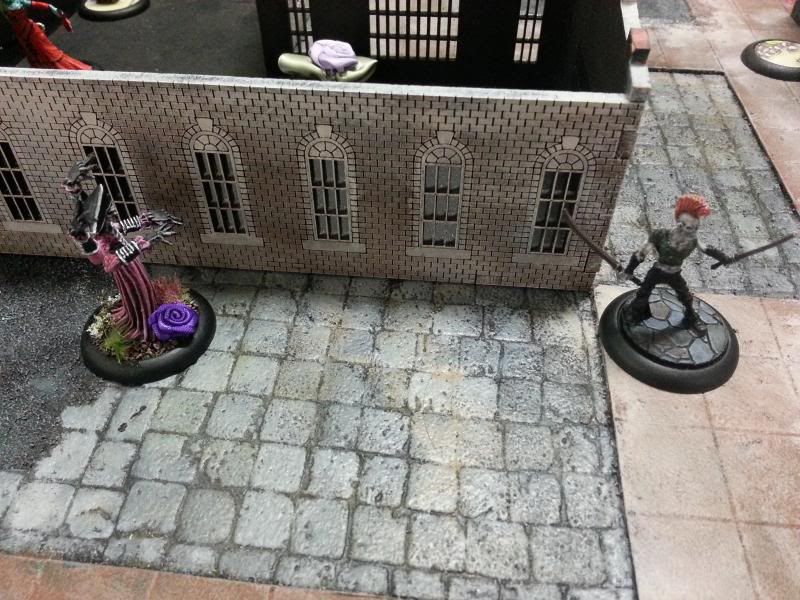
Kirai looks on as Izamu and Ikiryo take apart Von Schill's crew. 

The Result
A combination of Ikiryo (summoned from Malevolence) and Izamu (with help from Kirai’s Swirling Spirits and Datsue Ba’s Guide Spirits for the movement) took out most of the core of Von Schill’s crew, including Lazarus and the Freikorps Librarian. The Necropunks both attempted to threaten the Trapper on one flank but were taken out by Von Schill himself. The other Trapper was killed off by two Shikome summoned by Kirai. By the end of the game, Von Schill had helped secure one flank but was tied up by Ikiryo (swapped into position for a charge by Swirling Spirits). The rest of his crew had crumbled under the weight of Izamu and the summoned Shikome, making it a very comfortable win for Kirai.

Post-game Thoughts
Well after the game, both Chris and I were very impressed with what Kirai could do! Her effect on the game (ie. summoning and swapping models around) stood in stark contrast to Von Schill, who despite helping to secure a flank never seemed to achieve that much. I’ll admit this has also gotten me to thinking about what Von Schill’s strengths really are, but that’s for another blog.

Playing a summoning Master like Kirai was an interesting experience. Sure, I’ve played Masters capable of summoning before but aside from perhaps So’mer, this was the first time I’ve used a Master for whom summoning was a major part of her playstyle. Throughout the game, Kirai’s antics allowed me to summon two Shikome, Ikiryo and an ass-load of Seishin. I didn’t actually get a single crow in my hand from turn 2 onwards so summoning any more without a Soulstone to burn proved difficult. Still, it was more than I needed to deal with Von Schill’s crew. The Shikome made themselves useful taking out a Freikorps Trapper on the flank opposite Von Schill, and Ikiryo successfully held up and killed Lazarus with some assistance from Izamu.
The one aspect I didn’t like about Kirai’s summoning is how resource intensive it seems to be. Summoning even a mid-level minion requires a high crow (or a high card and a soulstone), so it tends to suck up the best cards in your hand, denying you the chance to use them for other important duels that turn. I don’t doubt that the summoned models are worth the investment, and in fact it helped me win this game by a good margin. But nevertheless it did feel like it was restricting what the rest of my crew could do, which I wasn’t entirely comfortable with.

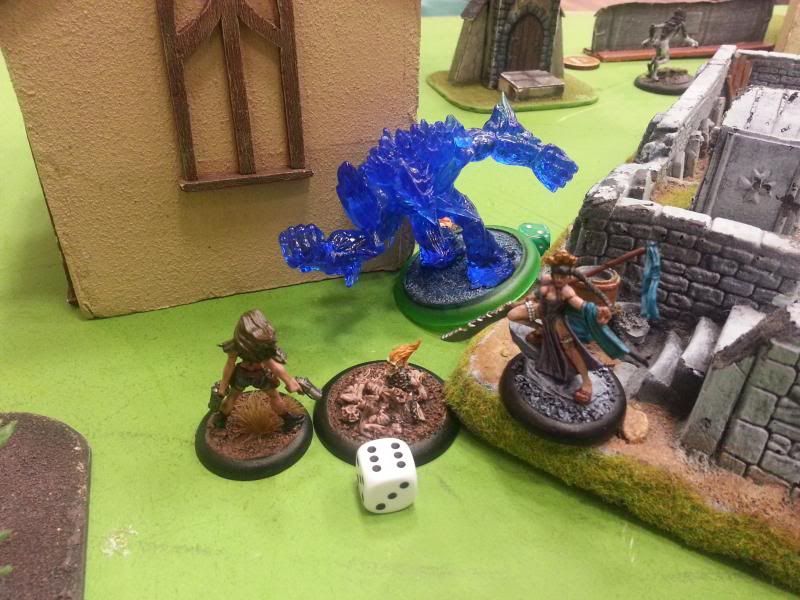
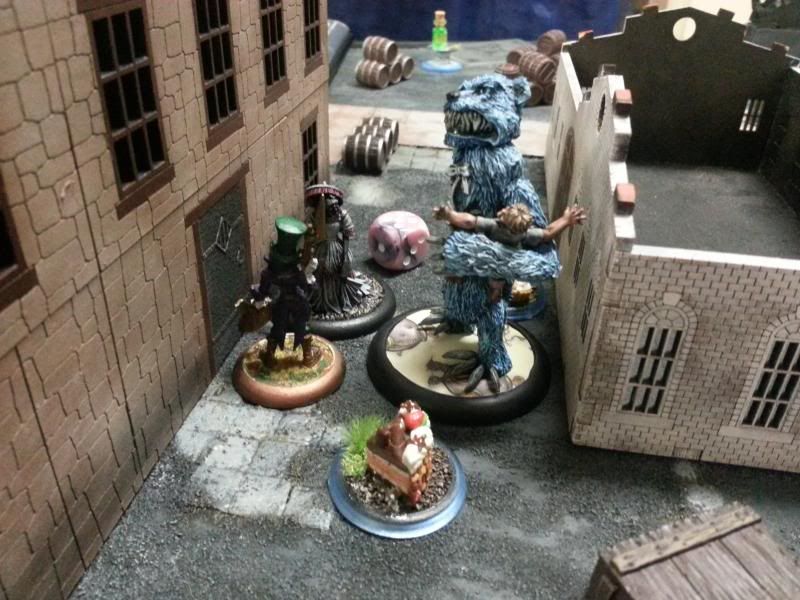
Ikiryo holds up Von Schill while a Trapper tries not to look too conspicuous in the background.

The other half of Kirai’s playstyle was the mobility-based tricks and in particular, her Swirling Spirits action. I’ll admit I got a lot of use out of Swirling Spirits. Between that and Datsue Ba’s (0) Guide Spirits action I was able to position Izamu far enough up to assist Ikiryo against Lazarus (wiping out a Librarian and Friekorpsman along the way), get the Shikome closer to their Friekorps Trapper target and reposition Ikiryo (who otherwise has a Wk of 2!) to charge Von Schill in the closing turns of the game. It basically allowed for some very impressive mobility for what would have otherwise been a slow crew.

Kirai’s activation in almost every turn generally consisted of (0) Call Forth to summon a Seishin, Then any combination of (1) Walk (to get into position), (1) Swirling Spirits (to swap other models around) and/or (1) Blood and Wind (to summon something IF I had the cards/soulstone). Near the end of the game she spammed Sunder Spirit for some damage vs Von Schill (and to stick Adversary on him), but otherwise she only rarely got any use out of the Actions granted by her upgrades. Honestly, the Stat card actions are where it’s all at with Kirai.

So it might not come as a surprise that Kirai’s most useful upgrade proved to be the one that just adds triggers - Unforgiven. It allowed her to summon Shikome without slow (getting them into the fray much quicker) and added some extra damage to her Sundering action vs Von Schill. I imagine I’d have trouble justifying her other limited upgrade, Bloody Shears, over Unforgiven. I love the theme of it and Accomplice itself has some great potential for getting the jump on opposing crews, but otherwise Unforgiven’s triggers seem to add quite a lot to what Kirai already does best.
I think Absorb Spirit and Swirling Aether are take it or leave it upgrades for Kirai. I’ll admit did use one of the actions on each card at least once during the game, but for the most part it just gives her another tool she can use when the occasion suits. When it comes down to it and as I said above, most of the time her Stat card actions are what tend to be the most useful.

The Seishin were actually pretty cool little spirits for Kirai. With the crew and upgardes I took I was able to summon quite a few throughout the game. I initially expected them to prove useful for summoning bigger spirits, swapping other models around and protecting Kirai. However they were also great as expendible peons - chewing up activations, sacrificing themselves to heal other models and generally just getting in the way to prevent enemy attacks or Interact actions. So while they might primarily be Kirai’s models, I can definitely see myself taking the models (Datsue Ba) and upgrades (Spirit Whispers/Spirit Beacon) to summon them in other Resurrectionist crews.

 My two Shikome. I've never liked the original model, so given half a chance I usually use my proxy. ;)

For the rest of the crew, well I’ve no complaints! Izamu was a no-frills killing machine, which was great. The Spirit Beacon upgrade was a natural fit for him, and allowed him to summon more than a few Seishin during the game.
I’ve already touched on Datsue Ba, but she was certainly another solid inclusion. Not just for her ability to summon Seishin, but also Guide Spirits for more mobility when it was needed (like for getting Izamua up the board). Her offensive actions were also nice, although for the most part I was using Weigh Sins to hopefully get the Adversary condition on other models. The main negative was her low wound count. In this game Von Schill’s crew never had a chance to take on Datsue Ba, but I imagine she’d go down fast against any model who can get around her Incorporeal.
I think the Lost Love is almost essential, purely so that you’ve got another model with Malevolence to help get Ikiryo out. The heal is a great bonus though, especially in a crew that can mitigate damage with Incorporeal.

As much as I love their paint job, the Gaki sadly never saw action in this game.

When building a Kirai crew, I felt like I was trying to strike a balance between two competing synergies. The first is with Malevolence, which encourages you to take living and undead models to summon Ikiryo off of. Then there’s the many, many ways in which Kirai can support her Spirits which are frankly, too useful to ignore. Of course there’s no low/mid costed models with both undead and spirit to fill her crew out with, so if you try to stick with just undead spirits then your options are pretty limited. That said, in practice I didn’t find this to be an issue. So long as the nastier models are Undead Spirits (which they were in my case), at some point your opponent is going to want to attack them. So while your opponent might try to delay it, Ikiryo’s arrival is still inevitable. Even better, I found it was a pretty effective way of discouraging models like Chris’s Trappers from attacking my undead. After all, Ikriyo is definitely well equipped to take out long-ranged shooters!

So overall, Kirai was a nice Master to throw onto the table. Her mobility tricks really appeal to me and there is a definite resiliance playstyle about her, with Ikiryo making it hard for shooters to put a dent into your big (undead) hitters, plenty of healing/damage reduction options, plentiful Seishin for activation control and of course, her summoning to win the attrition war. In terms  of negatives, I’ve already talked about my feelings on summoning – this isn’t really Kirai’s fault, but more my discomfort with the resource drain summoning  seems to be. This is probably an opinion that will evolve as I play through more summoning Masters this year.
Her focus on undead and spirits seem to restrict her options for a viable crew though – it’s difficult to justify taking a non-spirit model in her crew, and her Ikriyo summoning really encourages you to preference undead spirits (eg. Izamu, Hanged, Datsue Ba etc) for your high value models. I guess when you’re building a summoning crew with such a high starting model count (as above – 7 models before you’ve even spent a SS!), having a limit to what she’d actually want to take is a relief. But like I found with Dreamer, if you’re on your way to buying just about everything anyway, it does feel a bit restrictive!

Until next time,


Adrian

Tuesday, 20 May 2014

Catchup Week - Kaeris

My aim with the Rainbow Challenge this year has been threefold – Play all the masters (going well), Paint lots of crews (falling behind, but not a disaster yet) and keep up to date with this blog. That last part has been….um, a bit of a challenge, made all the worse by my insistence that I write 2000+ words every time I post something up!

At this stage I’ve played no less than 6 Masters for which I haven’t yet written anything for my Blog! This simply won’t do, so to recitfy this I thought I’d make this a bit of a Catchup week. So for the next 6 days I’m going to post up one article each day for each Master I still need to write about – Lucius, Pandora, Collodi, Lynch, Rasputina and Kaeris! In order to make this feasible I’m restricting myself to no more than one hour of writing per article. Well, hopefully not much more than an hour at least. :P So here goes…


The Master

To be honest, I'm not sure what to say about Kaeris. She was a Master I bought to use along side Marcus and later Mei Feng, back in Malifaux v1.5. I paid little attention to her progress in the beta and while I did play against her back in January, I don't remember her doing much more than run around and put burning on a few things. In any case, my experience of that game was dominated by the epic struggle between McMourning, the Firestarter and that damned Mech Rider! 

Fortunately, I did get some good advice from Mythic Fox's Blog, who's thread and blog article can be found here;

Anyway, today I was playing against John Metzakis, who’s been messing about with Lilith lately.

My Kaeris crew - she's really only missing the Firestarter now.

The Paint Job

I might be one of the few people who chose NOT to give Kaeris her wings! A strange decision to make, sure, but my main reason was one of practicality – fitting her in a carry case was going to be much harder if she has these big-ass wings to account for! So instead she got a backpack from Forgeworld (gotta love backpacks!) with one of the guns from the Malifaux Hats and Guns set. The colour scheme for my Kaeris crew was intended to be vaguely science related. So white “lab coats” with orange hazard clothing and a bit of “ethanol flame” blue for contrast. It also bares a passing resemblance to the primary colour scheme found in the computer game Portal. ;)

For the purpose of this challenge I only painted one additional model – the Eternal Flame, which I proxied from some bits that came with the Wyrd Flame Accessories pack. I would have also liked to do proxies for the Captain and the Firestarter but unfortunately, they were going to take more time than I really had.

I think you can guess what this is a pic of...

The Game

40SS, Standard Deployment
Strategy: Turf War
Schemes:
- Line in the Sand
- Breakthrough
- Distract
- Entourage
- Make them Suffer

My crew for the day. That Malifaux Child is really getting a workout...

The List

Kaeris
- Grab & Drop
- Blinding Flame
- Born of Fire
Joss
- Open Current
- Imbued Energies
Rail Golem
- Imbued Energies
2x Fire Gamin
Malifaux Child

With Turf war as the strategy I started with a pair of big beaters to dominate the centre – Joss and the Rail Golem, with 2 Fire Gamin as either support or flanking and the Malifaux Child to hand out Burning to my own models. Despite having played against her once before I wasn’t entirely sure how best to play Kaeris, but with both Entourage and Breakthrough available in a game against Neverborn, I decided to give her upgrades that would help her to deal with any quick flankers that try to get into my deployment zone. So Grab and Drop for its namesake action, Born of Fire to summon Fire Gamin and Blinding Flame to make her difficult to pin down.

The schemes I chose were Entourage and Make them Suffer.

A lone Barbaros faces down both Kaeris and a Rail Golem as the game nears its end.

The Result

John had this cunning plan to use Tangle Shadows to swap Barbaros with a flanking Fire Gamin, who would then deal with the second Fire gamin and then place scheme markers for Line in the Sand away from the rest of my crew. Unfortunately the plan backfired (that Black Joker!), so he instead settled for using Tangle Shadows on Joss, putting Barbaros into the centre against the Rail Golem and leaving Joss to face Lilith on his lonesome.  Joss put up a good fight, taking out a Terror Tot and bringing Lilith down below half wounds (triggering her Avatar!) before dying.

Thanks to the Malifaux Child casting Flaming Halo on him, the Rail Golem rapidly accumulated more burning counters than he’d ever need, using it to cast Locomotion where possible to help bust up a Young Nephilim and eventually Barbaros. A Cherub managed to slow and push him to blunt his effectiveness, but he remained a threat throughout the game.

Kaeris systematically took out a flanking Terror Tot and Young Nephilim in the first two turns, followed by the Cherub and most importantly, Lilith. The latter was helped in no small part by an exploding Fire Gamin. By the end of the game, with John’s crew all but wiped out and most of my crew still on the table (I only lost Joss and a Fire Gamin), it was a comfortable victory for Kaeris.

Once again, my love of random gear infects my models...

Post-game Thoughts

So I have some mixed feelings about how I used Kaeris and her crew, all of which stems from me trying to figure out how Kaeris is supposed to work. In this game I tried to play her as an independent piece, always attacking from 10” (the limit of her Immolate attack) and staying away from both her crew and from enemy models. This kept her completely safe, although against targets without Burning already on them (like when she killed Lilith), she wasn’t able to take full advantage of Immolate (her best damage dealer vs a single target) without first spending an AP to cast Flaming Halo on them. It also meant that she never got to use her Tactical actions, all of which encourage her to play close to both the enemy and her own crew. Truth in Flame for extra cards would have been great, Flare can help support her crew through her limited upgrades and Accelerant would have been a great way to take advantage of all the burning she could have thrown around at close range.

So all this leads back to the main question I was asking before and even after this game: “How am I supposed to use Kaeris?”. Is she supposed to be the mobile hunter I played her as, or should I have kept her close to her own crew, helping to hold the Turf War marker and dealing death from 2-3” away? What I’ve decided, however, is that she actually plays a lot like McMourning. Whether you play him as Guild or Resser, the Good Doctor is fantastic at supporting and being supported by his own crew but if need be, he’s mobile and deadly enough to go off on his own to achieve objectives and take on targets himself! Kaeris’s mechanics might be quite different, but she still works in almost exactly the same way. So when up close and in support of her crew she’s able to utilise all her actions and abilities to full effect. But as I found in this game, her high mobility and long projectile range on her attack spells allow her to split off from her crew and go it alone, if need be. I’ll admit she’s not as efficient as when she’s with her crew and she would really prefers her targets to already have Burning (for Immolate). But she’s still able to dish out plenty of damage with her Flaming Halo/Immolate combo, and seems tough and evasive enough to avoid getting crushed herself. In any case, using Kaeris to clean up a flank in this game was probably the best thing I could have done with her, since that made it much harder for John to achieve his Line in the Sand scheme.

Can I just pretend that the Eternal Flame burnt all the greenery off its base?

The Rail Golem is the other model I feel I misused, but unlike Kaeris I think genuinely could have done better with him! My mistake here was forgetting the lesson I learnt last time I used the Rail Golem: it really doesn’t need any help in generating its own Burning! Between the Stoked Fury and the Redline Trigger, it tends to have more than enough Burning to use Locomotion to near-full effect. So using a Malifaux child to cast Flaming Halo on him (for Burning +4, with the right suits!) was definitely overkill. I fact at one point the Golem was approaching Burning +12, and that’s while I was actively abusing Locomotion!
But that wasn’t my only mistake, oh no. I’d also given Kaeris Grab and Drop, meaning that if I activated the Golem within 6” of Kaeris it’d gain flight, then plant a scheme marker and lose its Burning Condition at the end of the turn. Not bad if you’re playing a scheme that needs those markers, but unfortunately I wasn’t! So for that rreason I kept Kaeris away from the golem for much of the game, but even that was unnecessary because as above, he really doesn’t need much more than the Burning he generates himself. And in any case, even if I wanted a little more Burning on the Golem I still had that Malifaux child, willing and eager to cast Flaming Halo!

Overall though, I think the Rail Golem is a superb choice for Kaeris. He doesn’t mind getting hit by Kaeris’s own burning attacks and he generates his own burning for Kaeris to take advantage of. That, and he still hits like a tonne of bricks so should be good for holding the centre. ;)

For the rest of the crew, I can’t say there were any surprises. The Fire Gamin are great for tying up enemy models and throwing Burning around, while Joss is still an incredibly resiliant killing machine, even against Lilith, as the case was in this game.


So once again and somewhat coincidentally, I find myself comparing todays Master to Sonnia. :P Both Masters utilise Burning in their own ways and like I said last article, Sonnia seems to prefer using that Burning to throw flameburst attacks from a long way away. Kaeris also deals damage through the burning condition, but trades raw damage and blast output for much better mobility and crew support (the latter mostly being through her limited upgrades). She doesn’t have the anti-magic Sonnia does but Kaeris is much better in melee, which is definitely a point in her favour.

----

So with that, we come to the end of Catchup Week and I am FINALLY up to date with my blog! Unfortunately it might be another week or two before I get another game in for the Rainbow Challenge and in any case, with 21 Masters played this year I’m rapidly starting to run out of painted Masters to put on the table! But that's a discussion for next week’s blog, in which I’ll give a more complete update on the progress of my challenge. :)

Until next time,


Adrian
Sunday, 18 May 2014

Catchup Week - Rasputina

My aim with the Rainbow Challenge this year has been threefold – Play all the masters (going well), Paint lots of crews (falling behind, but not a disaster yet) and keep up to date with this blog. That last part has been….um, a bit of a challenge, made all the worse by my insistence that I write 2000+ words every time I post something up!
                            
At this stage I’ve played no less than 6 Masters for which I haven’t yet written anything for my Blog! This simply won’t do, so to recitfy this I thought I’d make this a bit of a Catchup week. So for the next 6 days I’m going to post up one article each day for each Master I still need to write about – Lucius, Pandora, Collodi, Lynch, Rasputina and Kaeris! In order to make this feasible I’m restricting myself to no more than one hour of writing per article. Well, hopefully not much more than an hour at least. :P So here goes…


The Master

Rasputina is not a Master I’ve ever been excited about. Her static playstyle has never appealed to me, she’s always seemed like an easy Master to take down (just get her in melee) and I just never liked the old metal models. In the new edition Rasputina got some much nicer models, but that weakness in melee and static playstyle was still there, so she’s never really piqued my interest. So much like my game with Lady Justice, I went into this match with a certain expectation of how dull I’d find her.

Today was a rematch against Chris (Kadeton on the Wyrd forums) and his Viktorias crew.

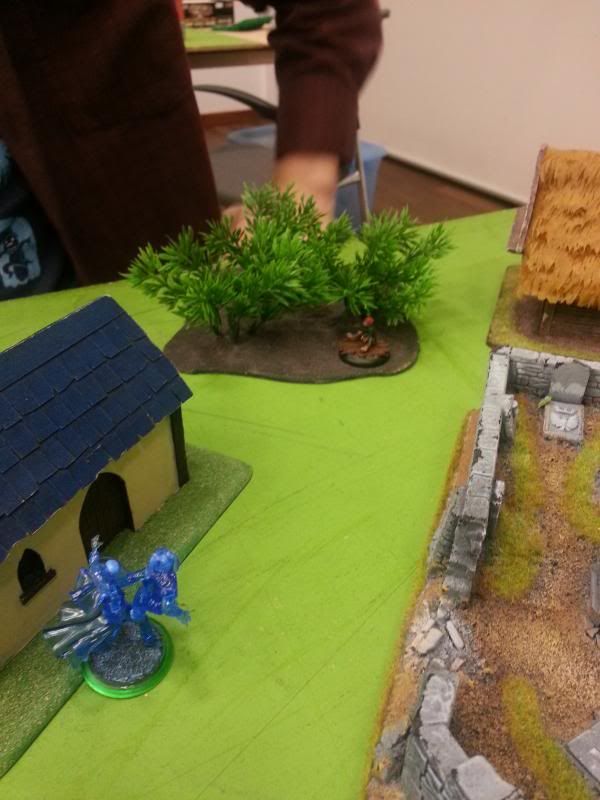
Invading an X-Wing table near you...

The Paint Job

I have to say I was pretty relieved when the transparent plastic Rasputina crew was made available. While I might be forced to play her for the Rainbow Challenge, at least I wouldn’t have to waste time painting her! I initially thought I’d use the blue transparent bases, but eventually decided on green as a contrasting colour, then a turquoise sort of colour for the snow/tundra to bring the blue/green together. It’s arguably the simplest crew I’ve ever painted, and the effort I put in probably matches my excitement for this Master. ;)

The December Acolyte was just a metal puppet wars mini I’d already painted, so I just stuck him on a base to match Raspy’s crew. I pinned him in the air partly to make it look like he was in mid-leap as he pounced on some hapless victim, but mostly because he broke off the base while I was gluing him!

It's a table!

The Game

50SS, Standard Deployment
Strategy: Reconnoiter
Schemes:
- Line in the Sand
- Assassinate
- Protect Territory
- Murder Protege
- Plant Explosives

Oddly, the green bases almost make her fit with the green board colour. Almost. 

The List

Rasputina
- Armor of December
- Sub Zero
- Arcane Reservoir
Blessed of December
- Imbued Energies
Ice Golem
- Imbued Energies
Wendigo
December Acolyte
3x Ice Gamin

I figured the December Acolyte and Blessed of December , (Imbued Energies) would help with the Rasputina’s low mobility, otherwise I just stuck with Raspy’s Starter box. I always figured melee was Rasputina’s weakness, so for her upgrades I went with Sub Zero and Armour of December, then Arcane Reservoir because you can’t go wrong with an extra card in hand!


The Result

With both crews pushing forward, Chris chose to advance more cautionsly to stay out of Raputina’s potential threat range. The December Acolyte and Raspy herself scored an early kill against a convict Gunslinger who strayed too close, but otherwise most of the Viks crew endeavoured to stay outside LoS. 

In the second turn, the Ice Golem saw an opportunity to charge Lazarus, leaving Raspy’s side to do so and dealing a moderate amount of damage to the construct. Vanessa and a Convict Gunslinger joined the fray to bring the Ice Golem down to three wounds, but the main event occurred at the end of the turn, when Ash Vik used Dragons bite to place herself and Blood Vik into base contact with Raspy. The resulting two attacks came very close to killing Rasputina, who then responded by pushing out of melee with Armour of December and blasting both with Decembers Curse! The Blessed of December leapt in to finish off Ash Vik, and Blood Vik soon followed when I won intiative in turn 4. At that point, with me having scored an extra point on Recon and achieved both my schemes (Protect Territory and Assassinate), Chris figured the VP difference was now insurmountable so we called the game.

Rasputina eyes off the Viks, who cunningly advanced AFTER Raspy activated.

Post-game Thoughts

You know I never thought I’d ever say this, but I actually enjoyed playing Rasputina! Not just because I like playing Malifaux, but because I actually, genuinely liked how she played in-game! Yes, she still had that static playstyle that I generally dislike, in fact she only moved about 12” the entire game (and even that was 6” forward, then 6” back). What I didn’t count on, however, is the sheer board control that Rasputina commands with her and her crew. The fact is, Rasputina doesn’t need to be fast. With Ice Mirror and a crew of Frozen Heart models there are few places Raspy can’t reach with her spells, and in fact Chris had a very difficult time keeping outside of Raspy’s threat range early on. That ability to respond to threats from half way across the board keeps Rasputina flexible and difficult for your opponent to avoid. Even her traditional weaknesses toward melee can be dealt with, in a sense…

I’ve previously played against Rasputina a few times, and each time I won handily just by getting the biggest threat, Raspy herself, engaged in melee as quickly as possible. With that in mind, I thought I’d take a crew that would help deter enemy melee models. As it turns out it’s not only possible, but is an integral part of how Rasputina now plays. The exploding Ice Golem and Gamin are a part of that, as is the potential to give Sub Zero triggers to your Frozen Heart models to further deter melee attackers. But the real winner for me was the Armour of December upgrade. Raspy’s inability to do much in melee was the main reason I chose Armour of December over Shattered Heart as her Limited upgrade, and in this game I did not regret that decision at all. Put simply, Armour of December is what won the game for me and without it, Rasputina would have died a horrible death at the hands of the Viks. So as far as I’m concerned, Armour of December is an auto-include. Shattered Heart is good sure, but the 3” push from the Armour is the easiest way to get her out of melee, without which she’s almost useless when engaged.

To be honest I didn’t get a lot of use out of most of Raspy’s other facets. I forgot she even had Counterspell until right now, and I never had a chance to take advantage of Freeze Over (for paralyse) or December’s Touch (the armour buff). Chris mentioned his woes against a Rasputina player who took full advantage of Freeze Over to paralyse models though, so I’ve not doubt it’s effective. Especially if I can combine it with the Wendigo’s Devour! Unfortunately for this game, the opportunity never came up. I will say that I’m not impressed by Biting Chill though. As her only (0) action I guess it’s better than nothing, but ultimately it just feels like a throwaway spell – use it if you’re in melee, otherwise it’s not worth thinking about. I certainly wouldn’t go out of my way to trigger One Thousand Cuts; 1-2 extra damage from another cast just doesn’t feel worth it.

Mr Golem takes on Vanessa (proxied), Lazarus (proxied) and a gunslinger (not proxied!)

Ice Gamin – they’re cheap, they explode when they die, they can boost the damage output of other Frozen Heart models and you can Ice Mirror Raspy’s spells through them. These seem to be the mainstay of Rasputina’s crew, and I can’t say I was disappointed with them. Combined with a Sub Zero trigger to ward off melee attackers they came across as a difficult model to get rid of without exposing the attacker to getting horribly mauled by the rest of Raspy’s crew. So while they didn’t do a lot, their potential was enough to make Chris wary of tackling them.

Like Rasputina, I was very sceptical about the Ice Golem at first. I’m not used to using melee-centric models as slow as the Ice Golem and if I hadn’t committed to taking Raspy’s starter crew, I probably would have replaced him with something else. Fortunately and also like Rasputina, the Ice Golem exceeded my expectations. He’s got good resilience, explodes when he dies and his melee output is great. Smash would have been nice to get off but his standard attack, with minimum 3 damage and an easy slow trigger, is still really good. I’m still not super-keen on his speed but in this game I mitigated that with Imbued Energies, which I felt is more than worth the expense!

Dragging along his Guild friend, the Wendigo hunts down his preferred prey - a defenseless Malifaux child. ;)

The Wendigo is a 3SS minion with a Wk of 6, magical Extension to cast Raspy’s spells, Devour, and the potential to give his Master fast. For 3 SS. That’s 1 SS less than an Ice Gamin. Honestly, I don’t see a reason not to take this model, and that’s all I have to say on that!

After the game Chris commented that he was initially only concerned about dealing with the Blessed of December and Rasputina, however in his own words, “That December Acolyte is fucking nuts!”. And at 7SS for a From the Shadows model who easily throws out slow with his attacks, I have to agree. In this game he helped shoot up a Convict Gunslinger and forced Chris’s crew to give him a wide berth thereafter (melee wasn’t an option when the survivor would almost definitely get evaporated by Rasputina in return). I could go into more detail on why he’s so good but honestly, I’d rather just link Dave’s (sssk) blog article where he goes into much more detail;
Suffice to say, December Acolytes are the ducks nuts. :)

Two scheme markers - the remnants of the Viktorias

I’ve used the Blessed of December before, and as far as I’m concerned she remains a great model. Highly mobile, with Ml 7, healing and some great triggers make her a very solid model to throw around, and I definitely appreciated her presence in my game with Raspy. Originally she was going to be my flanking piece but after that flank was covered by Lazarus (not a good target for the Blessed), he wound up hanging back to wait for an opening. In the end he was instrumental in helping to take down the Viktorias, where her Ml 7 made it much easier to win the duels and deal those last bits of damage.

 
A Ronin considers whether it's really worth taking on an Ice Gamin and December Acolyte at once.

It’s interesting to compare Rasputina with her closest counterpart – Sonnia Cridd. Both are a little like living artillery pieces but while Sonnia’s crew has better anti-magic and melee capabilities, Rasputina favours resilience in the form of armour, and debuffs like slow and paralyse. Both have the kind of threat ranges that force you opponent to make difficult decisions about how to tackle your crew and to my surprise, it’s a playstyle that’s I’ve actually enjoyed. If nothing else, without a crew of super-mobile models (which has been my usual preference) it forces me to put more thought into how I deploy and advance my crew, which in itself provides a nice challenge. But with the long ranged reach of Rasputina (and Sonnia) I don’t feel forced to play in a big blob, which thus far has been the only playstyle I’ve disliked in Malifaux.

As usual, I’m happy to field any questions or comments. :)

Until next time,


Adrian
Saturday, 17 May 2014

Catchup Week - Neverborn Lynch

My aim with the Rainbow Challenge this year has been threefold – Play all the masters (going well), Paint lots of crews (falling behind, but not a disaster yet) and keep up to date with this blog. That last part has been….um, a bit of a challenge, made all the worse by my insistence that I write 2000+ words every time I post something up!

At this stage I’ve played no less than 6 Masters for which I haven’t yet written anything for my Blog! This simply won’t do, so to recitfy this I thought I’d make this a bit of a Catchup week. So for the next 6 days I’m going to post up one article each day for each Master I still need to write about – Lucius, Pandora, Collodi, Lynch, Rasputina and Kaeris! In order to make this feasible I’m restricting myself to no more than one hour of writing per article. Well, hopefully not much more than an hour at least. :P So here goes…

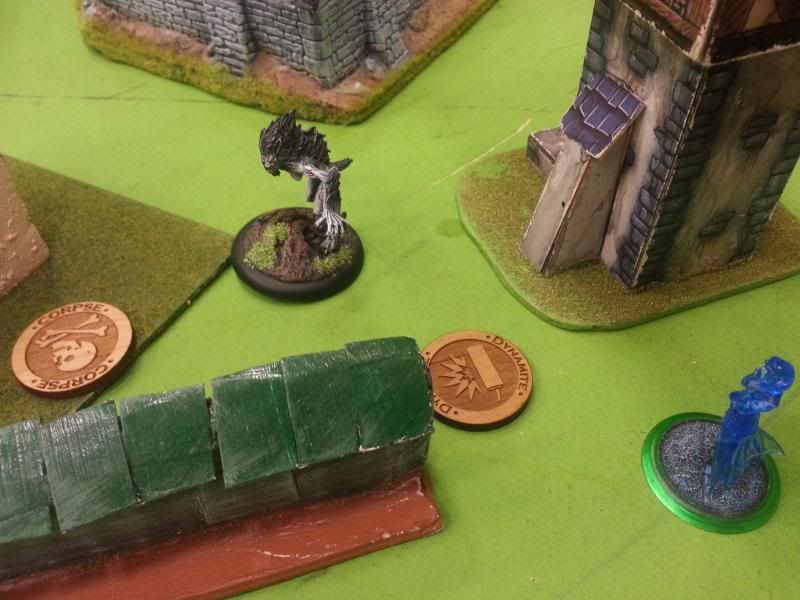
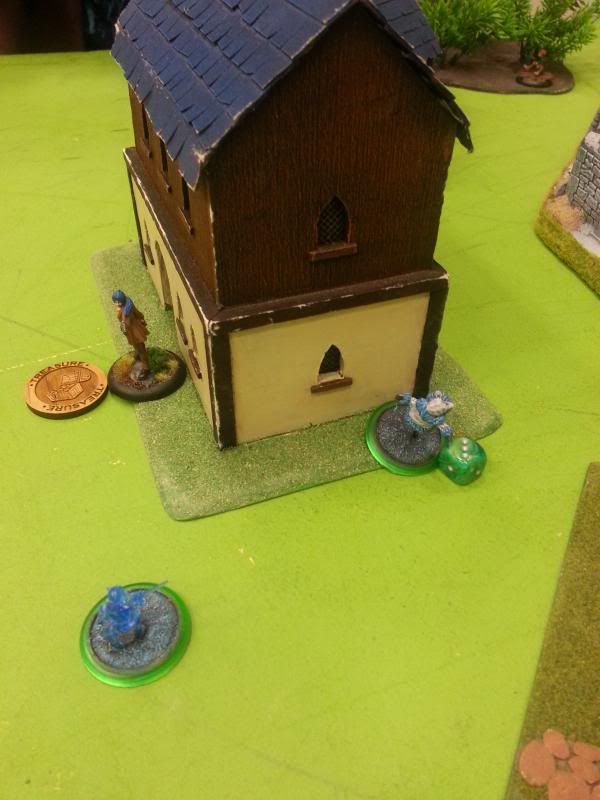
The happiest Tyrant you'll ever meet.

The Master

Much like the other Wave 1 Neverborn Masters, I’ve already played Jakob Lynch and wrote an article on my thoughts about him late last year. Back then I used him as Ten-Thunders at a small local tournament, but only in name. The only non-Darkened models I took was 1-2 Rail Workers (who are great with Lynch, BTW) and maybe the recalled Training upgrade on the Hungering Darkness on one game.

For this game I instead stuck with him as Neverborn, and played once again against Chris (last seen tackling my Pandora Crew with the Viktorias). In this game he went with Hamelin. The last time I faced Chris with Hamelin he flattened my Tara crew in very short order. Sure Tara’s a tough Master to use, but I was still somewhat nervous about once again facing this Master.

Honestly, I'm as surprised as you are that the yellow didn't suck...

The Paint Job

Fate deck bases are some of the easiest and most effective basing schemes I’ve done for my crews. Lynch was my second attempt at this (the first being Dreamer) and together with the purple transparent bases and the yellow/purple colour scheme, I think they turned out quite nicely!

Today's table. 

The Game

40SS, Standard Deployment
Strategy: Squatters Rights
Schemes:
- Line in the Sand
- Bodyguard
- Assassinate
- Cursed Object
- Power Ritual

Not a single Illuminated in sight.

The List

Jakob Lynch
- Endless Hunger
- Woke up with a Hand
Hungering Darkness
Doppelganger
- Useless Duplications
Mr Graves
Beckoner
Waldgeist
Terror Tot

I’ve already used Jakob with a “Brilliance focused” crew build, so I thought it would be interesting to try a different kind of list. I jotted down a few different possible iterations and what I ended up with is actually a kind of Mimic crew, with Graves as the muscle, the Beckoner for movement tricks and a Doppelganger to help achieve the interact-hungry Squatters Rights Strategy. Then there was the Waldgeist to hold ground and the always handy Terror Tot to grab unguarded markers.

For schemes I went with Bodyguard and Assassinate. With so many peons, Hamelins crew seems naturally good at foiling Cursed Object, plus the rat kings can really mess with enemy scheme markers so that really just left the two kill-focused schemes. Not ideal, but I figured why not? ;)

40 SS Hamelin. It starts off so "small".

The Result

Chris and I agreed on 40SS for a relatively quick game. However it turned into a really cerebral affair, with both of us wrestling for VPs from both the Strategy and our respective schemes.

In the end, the Hungering Darkness skirted past Hamelin (who was apparently too happy to leave him be) to tackle Hanns and ensure I achieved Bodyguard, while the Terror Tot tied up a chunk of Hamelins crew on the flank. The Waldgeist held the centre for a few turns, but was taken down by Nix and Hamelin thanks to obsene levels of Blight. The other flank, however, was where all the action happened. There, a struggle played out for Squatters Rights markers between Hamelin and his various rats/rat catchers against Lynch, the Beckoner, the Doppelganger and Graves. In the end Hamelin fell to the combined might of Graves and a Graves Lookalike (yay Doppelganger!), which earned me enough VPs to win the game.

Never bring a gun to a Monster fight.

Post-game Thoughts

As I said above, I was interested to see whether Jakob Lynch and the Hungering Darkness could do well without the usual complement of Illuminated and other Brilliance-focused models. And as it turned out, he didn’t disappoint! The Hungering Darkness more or less went it alone in this game and while having some other models around to hand out Brilliance could have helped, he ultimately didn’t need it to ensure he remained a sizable threat. If nothing else, he was threatening enough for Chris to want to avoid him for the game, which worked to my favour since it allowed me to take out Hanns (whom I thought might be a Bodyguard target…it was actually Nix) and achieve Bodyguard for myself.


Jakob Lynch gets some great benefits from having Brilliance on enemy models, especially when taken with his Woke up with a Hand upgrade. But with Pay for Blood and his Pistol he’s good enough at putting it on models himself, so I never felt as though he was unnecessarily restricted by the lack of other Brilliance models around. He still hits like a truck when he wants to and it was thanks in no small part to him that I eventually brought down Hamelin. 

Mr Graves was a model I really enjoyed using. Armour, Hard to Kill and Black Blood makes him tough as nails, he does some great damage with Fence Post With the Hungering Darkness going AWOL for most of the game, Mr Graves provided my crew with the melee power it needed, and he kicked arse and took more than a few names in the process! But most importantly, Mr Graves has an excellent push effect in the form of “Show ya the Door”. If you want to know what I think of push effects, you need go no further than the article I wrote in Wyrd Chronicles 10. Suffice to say that they’re awesome, and I used it to good effect to push both friendly and enemy models into better positions.

 So much sleeze right there

The Beckoner was taken mostly for Lure, and she didn’t disappoint. Early in the game she pulled enemy models out of position and into danger, and later on she was able to pull the likes of Jakob Lynch out of danger and Graves into danger. She even managed to use Sales Pitch to kill a pair of Stolen next to Lynch before he activated to take some Blight. To be honest none of this was a surprise. As above, I’ve found Lure and other push effects to be invaluable in any games I’ve used them!

This is arguably the first time I’ve really appreciated having a Doppelganger in my crew. As per my original Pandora blog post I’ve always been a little wary of her. She just seemed so resource intensive and I’ve often had trouble justifying her over other models with better defined roles, like an Illuminated. This game, however was the first time I really started seeing the value in her flexibility. For the most part she paired up with Graves, mimicking Show ya the Door to push herself and another model (often Graves) into better positions or borrowing his Fence Post to deal serious damage to Hamelin and co. There wasn’t a single turn in which I felt the Doppelganger was wasted space. Adding Useless Duplications was a great trick too. It took me a bit to explain (and understand) exactly how it worked with Chris, but it certainly gave both her and Graves a measure of protection throughout the game, which was quite nice.

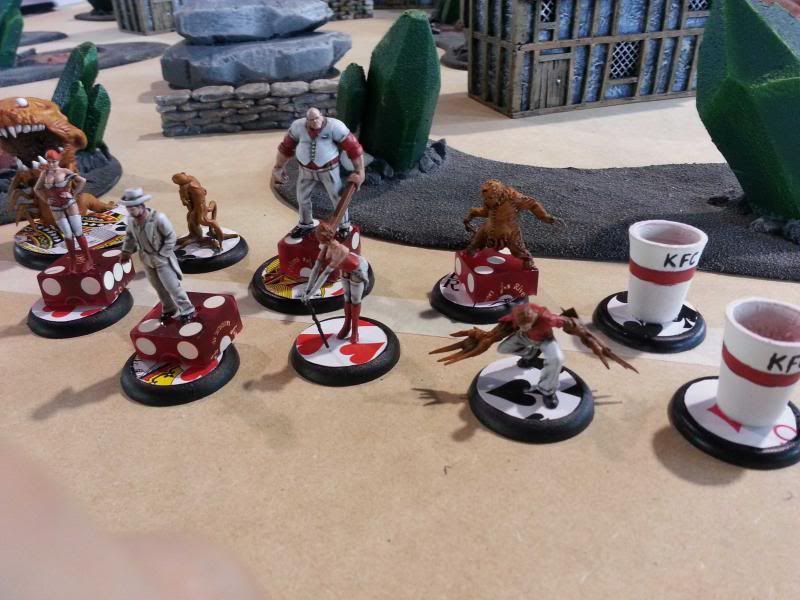
Just in case you're considering alternative schemes...apologies to the original owner, I never caught his name when I took the pic of his crew.

One of the key characteristics of the Neverborn Masters is that they all tend to have a lot of specific synergy with other models. For instance Pandora has her Woes, Dreamer has his Nightmares and Collodi has his Puppets. For some this synergy feels like an essential part of their playstyle. For instance I can’t imagine playing a Collodi or Dreamer game without a sizable complement of Puppets or Nightmares, respectively. But other Neverborn Masters have much less reliance on their model synergies – Lilith (Nephilim) and Zoraida (Swamp Fiends) being key examples.

As I’ve already said in my Dreamer and Collodi posts, I’m a little wary of Masters that feel tied to taking certain model types to work well. So by extension, I’m quite glad that Jakob Lynch is not as reliant on Brilliance as I thought he might be! In this particular game I went heavy on the Mimics, but I can imagine he’d actually slot nicely into most other crew builds too, be they Neverborn or Ten Thunders.

Anyway, I think I’ve said enough. Suffice to say that I’ve quite enjoyed playing Jakob Lynch. :)

As usual, I’m happy to field any questions or comments. :)

Until next time,


Adrian
Thursday, 15 May 2014

Catchup Week – Collodi

My aim with the Rainbow Challenge this year has been threefold – Play all the masters (going well), Paint lots of crews (falling behind, but not a disaster yet) and keep up to date with this blog. That last part has been….um, a bit of a challenge, made all the worse by my insistence that I write 2000+ words every time I post something up!

At this stage I’ve played no less than 6 Masters for which I haven’t yet written anything for my Blog! This simply won’t do, so to recitfy this I thought I’d make this a bit of a Catchup week. So for the next 6 days I’m going to post up one article each day for each Master I still need to write about – Lucius, Pandora, Collodi, Lynch, Rasputina and Kaeris! In order to make this feasible I’m restricting myself to no more than one hour of writing per article. Well, hopefully not much more than an hour at least. :P

Today, it’s all about Collodi!


The Master

Ah Collodi. What can I say about Collodi? Back before M2E Collodi was a Henchman, and a fairly broken one at that too – her mobility and model count meant she was just a little too good at a whole bunch of the strategies and schemes. From memory, I believe I took her to a tournament, played a few games with her and put her straight back into my case, never to be seen again. I’m not a fan of using overpowered models and with her crazy model count and multiple push effects, Collodi was complicated Henchman to use too.

Anyway, fast forward to M2E and it looks like it’s finally time for me to give Collodi another try. I did give her a game or two in the beta but I didn’t find her to be very fun. That, and against beta Molly they all just got mauled  by her “everyone takes a Wound” summoning trick. I sort of moved onto playtesting other Masters after that, but I have heard good things about Collodi – Mike Marshall (of Malifools fame) has certainly found him to be pretty strong.

For this game, I was up against Mary with her Seamus crew.

The rest of the crew is below but hey look! A Stitched Together!

The Paint Job

There’s not too much to say about the paint job I did with Collodi. His base set was done back when all my Neverborn had the same “enchanted forest” type basing, but after I’d improved my technique for painting Pink. A lot of people apparently dislike Collodi’s pose but I actually enjoyed it. It might be because I mixed the top and bottom hand around (or maybe everyone else did? But in any case, the model works for me! The Stitched were my favourite models to paint though – lots of blood and guts, plus I went to the effort of painting little hearts on them, as if they were once some kid’s pyjamas. ;)

I initially wanted to wait until I had some Corphee before giving Collodi a run but actually, once I’d thrown in the Widow Weaver and proxied some Effigies from my Puppet Wars collection it turns out I could still make a half decent crew without them. The one model that’s missing is Vasillia. I actually have a proxy for her undercoated, but I didn’t get the time to actually paint her so she stayed at home.


The Game

45SS, Standard Deployment
Strategy: Reconnoiter
Schemes:
- Line in the Sand
- Bodyguard
- Breakthrough
- Entourage
- Plant Evidence

For some inexplicable reason I missed the Widow Weaver  in this pic, who's base you can JUST see on the right...

The List

Collodi
- Fated
- Threads of Fate
- Breathe Life
Widow Weaver
- Handbag
4x Marionettes
Stitched Together
Brutal Effigy
Mysterious Effigy
Shadow Effigy

So basically Collodi, a pile of Puppets and the Widow Weaver with the ability to make more Puppets. Seems logical enough Reconnoiter Strategy, right? I initially thought about taking Wicked Dolls, but eventually I decided that the Effigies would be better and I could probably summon Wickeds from the inevitable scrap counters anyway!

For Collodi’s upgrades I decided that buffing the puppet horde seemed like a better idea than buffing Collodi himself, so Fated was chosen over Bag of Props. After that I went with Breathe Life for the healing and push shenanigans, and Threads of Fate for a bit more puppet resilience and the anti-push shenanigans (which seems pretty important when so much of Collodi’s playstyle seems to revolve around staying near his Puppets).

 The puppet horde advances on the alley way, as Collodi throws out conditions like it's candy

The Result

With Collodi being so focused on having Puppets around him I decided not to focus too much on achieving Reconnoiter. Thus Collodi and the Puppet-ball mostly moved up and got into a brawl with Seamus and some of his undead minions. Being Paralysed (thanks to the Widow Weaver) slowed him down for a turn, but ultimately a Teddy, summoned frm the corpses and scrap of belles and dolls, proved his undoing. He didn’t die by the end of the game, but another activation would have finished the job. On the rest of the table, a Brutal Effigy (supported by a Marionette for its push action) and  Stitched Together were put on scheme marker duties, with the Stitched dispatching a Rotten Belle and Canine Remains, and the two of them both placing friendly and removing enemy scheme markers to achieve plant evidence and Line in the Sand. The Mysterious Effigy and another Marionette planted a literal pile of scheme markers on the other flank and together with some scheme marker removal on both sides, Collodi edged out the win against Seamus.

The Widow weaver is faced with a tough choice - Paralyze Seamus or summon Teddy? 

Post-game Thoughts

Collodi definitely has the potential to be a brutal Master when he wants to be. Pull the Strings in particular is just amazing. If it just gave out slow it’d be good, but the damage and the other “take a (1) action” triggers are just nuts.  If anything it kind of felt as though it superceded his My Will Action – why get another puppet to attack when Collodi will usually do it better? But now that I think about it, My Will is any (1) action, so it could have potential for some out of activation interacts in particular.
Collodi’s base resilience isn’t great, but his Decoy ability plus the Run away home trigger for an easy push out of danger keeps him relatively safe. And that’s ignoring the fact that he’ll probably have any number of other protective conditions on him, either from the Effigies or through his own actions.

One of the things that really struck me about Collodi is that he LOVES his conditions. Being able to pass on Conditions to all nearby Puppets with the Fated upgrade really encouraged that, and most turns I was making sure I had either Armour or Defensive, as well as an Effigy condition on Collodi (and thus on his Puppets). In fact, I feel like I had too many conditions available, and not enough ways to use them. As above, Fated can only pass on one Effigy condition and one “self” condition, and there’s only so much benefit a back line-style Master like Collodi can get from piling on anything extra. In retrospect I probably would have done fine with just one Effigy, rather than three, with the extra SS being spent on something with more hitting power.

Between Pull the strings and this focus on conditions, I never got much of a chance to actually summon any puppets. He just seemed to have better things to do with his AP (ie. Pull the Strings or Defensive Stance, for instance) and in any case, I was sort of hoping I’d have enough scrap markers around to eventually summon a Teddy. More on that below. ;)


...Teddy it is then. :)

This is starting to get longer than I hoped so I’ll just say one thing about the Marionettes – I actually found it handy to have one supporting any Puppets away from Collodi with his Push effect from Dragging along. It helped get the Brutal Effigy out of melee with a Punk Zombie, who then went on to plant some scheme markers for me so all in all, having that Marionette around was actually worth it!

The Widow Weaver was amazing. Just. Amazing. The Web counters proved to be an excellent area denial tool, and any poor shmuck who got close enough (Seamus, for example) was paralysed thanks to Seize Prey! It will only work once or twice in a game at most, but the threat of it should be enough to keep your opponents models away. Actually I’d seriously consider ranking the Widow Weaver second (after the Nurse) on the list of reasons why you should have condition removal in your crew! Failing that, I can definitely see the Widow Weaver being a prime target on your opponent’s “to kill” list, and with some very average defensive stats she’s definitely squishy.

When I took the Weaver’s Handbag I was secretly hoping I’d get a chance to summon Teddy, so I was quite pleased to see that happen! In reality it was a cool trick, and while two turns of Teddy helped me take Seamus out of the equation, VP-wise, I’m not sure it was enough to make the Handbag an auto-include. The summoning is great, sure, but to me the main reason you take the Widow Weaver is for the Web Markers. The Handbag gives her something else to do, but the higher SS investment means it’s probably not always the best thing to take.

The Shadow Effigy guards its precious pile of scheme markers from the ugliest Madame in Malifaux. 

Playing with multiple Effigies in one game certainly gave me a good impression of how they work and perhaps more importantly, their strengths and weaknesses. On the plus side, they’re tough and they are fantastic for buffing their Leader in some way. On the other hand, their hitting power is just terrible, which really relegates them to a support role and by extension, probably made taking three a bit overkill. Of the Puppets I took, the Shadow Effigy was really the standout. Blend into Shadow helped blunt any attacks coming my way and Remember the Mission was phenomenal for putting out scheme markers. In fact three of my Line in the Sand Markers were safely (sort of) piled onto a single flank thanks to this little guy. The other two, the Brutal and the Mysterious, were somewhat lacklustre. I had to use the brutal to help plant scheme markers away from my main force, so his talents were somewhat wasted aside from the potential with Finish the Job. The Mysterious did pretty much nothing all game. The push from Rapid Acceleration never seemed worth giving to Collodi (and friends) compared with the Shadow Effigy’s own (0) action. I also never actually bothered with Disguised Fate – cheating face down just didn’t seem worth the effort when most of the crew consisted of cheap puppets. That said, I can see both puppets being useful in other crews, and in fact I got a lot of use out of the Brutal back when I played Perdita. It’s just that for a Collodi crew, and in this game, the Shadow Effigy outshone the rest.

One thing I noticed was missing from the Collodi crew I took was killing power. For all the conditions I could layer on, I was still just using Marionettes and Effigies to fight off my opponent and honestly, they don’t hit all that hard. Perhaps should have I’d tried harder to get the Marionettes working with Collodi’s buffs? Or if I’d added a Wicked Doll or two to further boost nearby models damage output?

The Stitched together was the sole exception to this – if I had the cards on hand his Gambling abilities allowed him to hit pretty hard. So if I played this again I’d probably consider adding another Stitched, purely for some half-decent killing power that doesn’t rely on the Collodi ball.

Collodi convinces a Punk Zombie that placing scheme markers for Breakthrough is a bad idea.

Final Impression

Okay, so most of the above is pretty positive about Collodi, but when it comes down to it, I still didn’t like how he played. With the buffs he can hand out, Collodi seems to almost demand that you keep his puppets close by. So you end up spending most of your crew allowance on the likes of Marionettes and Effigies to work with Collodi, leaving little room for something that can fulfil its duties away from the main Collodi/Puppet ball. Hell, even the Widow Weaver practically begged to hang out with Collodi thanks to his +1Wk aura with Playthings and his summoning potential from the handbag.

To me, that style of play, where you’re clustering most of your crew together, feels very constricting. I’d much rather have my crew spread out, projecting power all over the board and not be forced to sit in a big clump somewhere. You might argue that by the same logic I shouldn’t like Guild Lucius, but even in that case Lucius’s support tricks can have a hefty range to them, plus the strong shooting allows the crew to project their power all over the board, even if they are a little clumped together.

Anyway, I hope that makes some sense. Maybe my negative impression of Collodi was more a factor of the crew build I went for and if that’s the case, I’d definitely like to know. So as usual, please feel free to comment below. :)

Until next time,


Adrian
P.S. Yes, this took longer than an hour to write. I'll try harder tomorrow! :)

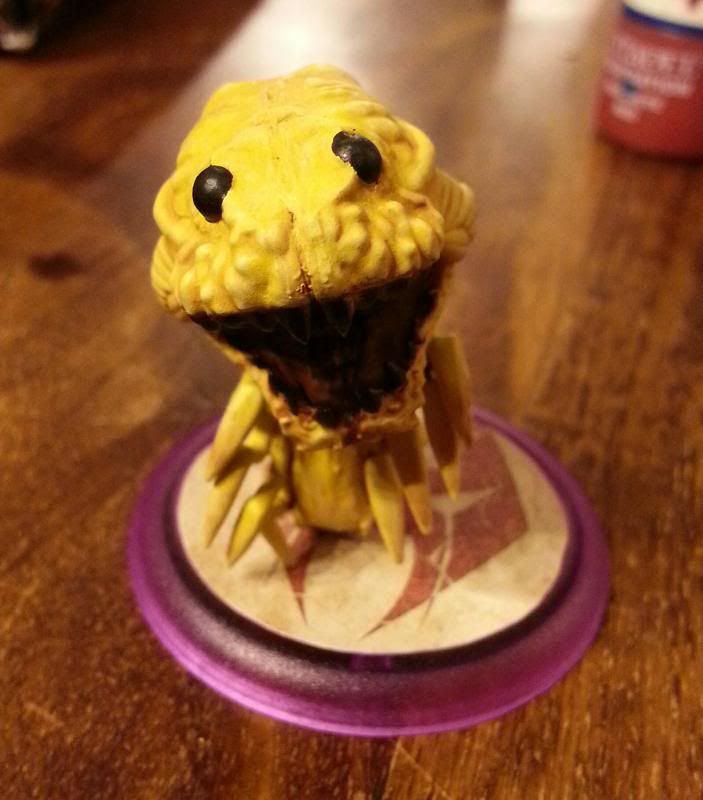
Hey look! It's the Widow Weaver!