For this blog post I thought I’d take a "quick" break from my
usual Rainbow Challenge posts (yeah, it's been a while since my last update) and bring up something I’ve been playing around
with lately. This could have probably been a thread on the Wyrd forum but then
again, how else am I going to get people to read my blog? ;)
So lately I’ve been burning through the Outcast faction,
trying their various Masters for my Rainbow Challenge and getting an idea of
how they work. They were also the faction I decided to take to Gencon, so I
suppose it was inevitable that I start looking at the Faction as a whole and
whether there were any combos I could use to deal with perceived weaknesses. As
it turns out there’s one set of models I’ve developed a particular fondness
for. So without further ado, let’s just get straight into the details;
Obedient Wretch (4)
3x Malifaux Rats (3x2) = 10SS Total
3x Malifaux Rats (3x2) = 10SS Total
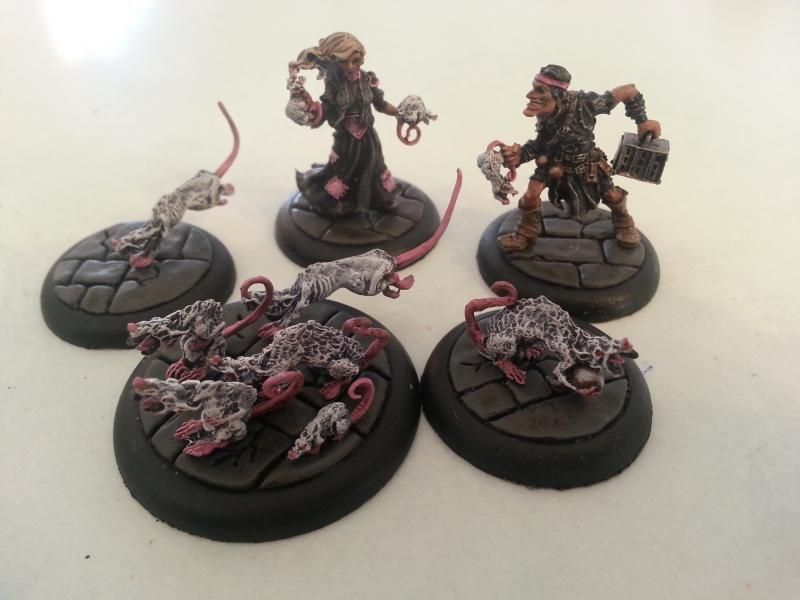
It may not seem like much, but this little team offers some
incredible utility for a paltry 10SS. If you know anything about these models
you’ll quickly realise their greatest advantage – activation control. Here’s
how their first turn activations would typically go;
1-3. Malifaux Rats move up, remaining within shooting range
(6”) of the Obedient Wretch
4. Obedient Wretch activates and attacks the Rats twice with Tossed Rat, triggering Stink of Death with a flipped/cheated crow.
5. First summoned Rat activates (ideally outside 3” of 3 other rats) and does whatever.
6. Second summoned Rat activates and being within 3” of 3 other rats, is sacrificed to create a Rat King.
7. Rat King activates, then uses Rat Problem to sacrifice itself and summon a Rat Catcher and Malifaux Rat
8. Rat Catcher activates and casts Moldy Cheese on the Malifaux Rat, giving it Reactivate
9-10. Final Malifaux Rat activates twice, probably doing nothing of importance.
That’s 10 activations for 10SS, but even if you only summon
one Rat with the Obedient Wretch and/or don’t summon the Rat Catcher, that’s
more than enough to out-activate most other crews in the game. The above
requires your opponent to leave those models alone for the turn (likely, if you
deploy them well enough) and requires two crows (for Stink of Death) and a 4+
of any suit (Moldy Cheese). The worst that can happen is if you flip severe damage for the Obedient Wretch’s Tossed Rat (killing it) or as usual, if you
flip a Black Joker for anything. Mind you, the only flips you're making are for Tossed Rat and Moldy Cheese, so the chances of flipping that Black Joker aren't high.
I’ve found that the activation control this crew offers is a
great boon for both Misaki and the Viktorias, both of whom value activating later
in the turn to avoid too many models counter-attacking them after they’ve
killed something. Tara might not care so much (she'll still want to activate first most times) and I don’t care enough about Von Schill to
make a judgement call for him. :P As for Hamelin, well he’s going to have these models
in his crew anyway. ;) Leveticus might not need the activation control but with
his need for 6SS models and the fragility of Hollow Waifs, he might appreciate
the ability to activate some chaff regardless. Having said that, activation
control isn’t all that this combo offers. Lets look at the models in more
detail, shall we?

Obedient Wretch
Even after throwing the initial few Rats to get the combo
running, the Wretch is still a nice cheap minion to chew up an activation and
plant scheme markers as needed. If worst comes to worst she could always
sacrifice herself with Inevitable Fate to summon two more Rats (and by
extension, hopefully another Rat King), but her real ace in the hole (apart
from summoning Rats) is her Bleeding Disease attack. Every model in this
Rat-combo can add Blighted to enemy models, either with their basic attack or
in the case of the Wretch, through her Diseased Aura. As the Blighted Condition
adds up, the Bleeding disease attack starts dealing some obscene damage, giving
the Wretch some great potential as a way to finish off particularly tough enemy
models.
Malifaux Rat
Useless, right? Wrong! I often feel like people
underestimate the value of Peons. They may not be able to interact or count for
scoring most strategies or schemes, but they can still prevent engaged models
from charging/interacting, can’t be interacted with (for Cursed
Object/Distract) and will in fact prevent certain schemes of your opponents
(eg. Protect Territory).
Rat King
It may not be a killing machine, but it still packs a
respectable punch and has some nice tricks in the form of Bore (to give models
in base contact slow) and Drawn to Contagion (for (1) action Charges vs
Blighted models). But the main reason I’ve been loving this model can be summed
up in one word: Gnaw. Games can be won or lost on Scheme markers, so being able
to just remove them from under your opponents nose with this (0) action from a Rat
King is fantastic.
Rat Catcher
The Rat Catcher is sort of a mix of the between Rat King and
Obedient Wretch. His average melee abilities are supplemented with some great
automatic triggers, including granting slow, extra damage to Blighted models
and summoning a Malifaux Rat. Covered in Rats gives him some good resilience in
the form of Armor +1 when his Rats are nearby but similar to the Rat King, I
like the Rat Catcher for its Don’t Mind Me ability to place scheme markers
whilst engaged.
So not only does this 10SS combo give you excellent
activation control when you need it, but it also lets you summon models that
help deal with another common weakness with Outcasts – scheme marker
manipulation. Even without scheme markers to mess with they’re still useful for
Turf War and Reconnoiter (it’s basically 2 non-peons, maybe more, for 10SS). Reckoning is
definitely their weakest strategy but even then they can prove useful, since
you could just avoid exposing the Rats to your opponent and the Rat King with Bleeding
Disease is from the Wretch could definitely claim a few heads of their own.
I hope this has convinced you all of the value of these
models to the Outcasts. What started for me as some niche models to deal with a
specific problem has fast become the first models I take in most of my Outcast
crews, and I can only assume they’ll wind up being a common addition to other
players crews as well. ;)
Later,
No comments:
Post a Comment